


i just made this as i went along, with out a template, so i will try and walk you through it.
first you need to cut two sides for the head like the picture below.

then use a tape measure, and measure around the head (but not the back), then cut a long strip for the middle part of the head, then pin all three pieces together and sew with your sewing machine. then turn it inside out so the rough edges are on the inside, now check the head shape is ok. then turn back inside out and lay on a piece of fabric for the back. and pin it and stitch all the way around, leaving the bottom part open, and then turn the right way again and stuff it. now put to one side and draw two antlers, and then stitch two pieces of fabric together trim off excess and turn inside out, and stuff these.

then i found that they were a bit floppy, so i made two small holes in the stags head and inserted a pencil half the way in, then with the antler i folded the rough edge in, and slipped it over the pencil, then hand stitched it to the head


then i made two little ears and stitched them on.
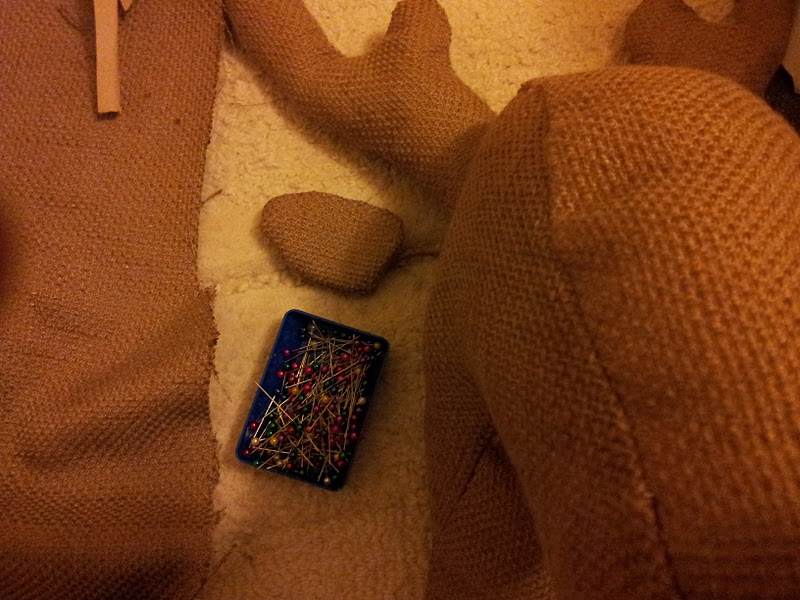
then in the hole at the botton, i inserted some cardboard up the back so that it was flat, and folded the rough edges in and stitched it up. this makes it a firm base to hang it to the wall.

then you have your plain stag head, next to make it look like grain sack material i stenciled on words. i put masking tape along the seams so that the words didnt cross over to another of the sections.


then i made two small holes in the back and slipped a cable tie through it so that it could be hung on the wall.


such a great tutorial and best thing of all…no stags were hurt in the making of this project : ) thanks for sharing…hugs…
super cool! Thanks so much for posting this…I pinned it 🙂
That is so awesome! I love it! 😀 Thanks for sharing!
Wow! You are a Christmas crafting genius! So glad I found your project via Centsational Girl.
Please stop by for a visit to my blog. I am currently in the midst of a Gifts to Make series.
Be Merry and Bright!
This is beyond cool! Pinning! I also love the font you use on your blog.
So cute! I have 3 boys and this would look so cute in one of their rooms. Love the stenciling!
so clever! Love it!
This is great!!!
Girl do you ever sleep, cause you are one busy lady. I can't believe the projects you can put out, and all so beautifully done. you sure have it going on. I love this project and all your other ones too. Could you please send me some of your energy? Thanks so much for all your creative projects you share over at Sunday's Best.
Very cute! I would love it if you would stop by and share at the crafty link party going on right now at Lines Across.
I hope to see you soon,
Rachel
http://linesacrossmyface.blogspot.com/2011/12/cure-for-common-monday-22.html
So adorable, thanks for linking to our pin'inspiration party last week. You are one of our features, would live for you to pop by and grab a button.
So fun! Great tutorial too!
HI Aimee,
I love this tutorial and the Product of Britain pillow tutorial too. I'm going to link to both of your tutorials in one of my Freebie Friday round-ups of tutorials on really like. I was going to feature this one in April 2013. May I use one photo from each tutorial to encourage people to click the link to visit your blog? I can't find any copyright info on your blog.
Thanks,
Colleen