• Skip to primary navigation
  • Skip to main content
  • Skip to primary sidebar
  • twigg studios

    A British baking blog, food photography

    • Home
    • BLOG
    • WORKSHOPS
    • SHOP
    • PORTFOLIO
    • Contact
    • hire me
    • ABOUT ME
    June 8, 2012

    thrifted fabric peonies tutorial

    Uncategorized

    ps,  dont forget to enter the pick your plum giveaway it ends 21 st june go here to be in with a chance.

    Photobucket
    sew chatty
    etcetorize
    everything under the moon
    not just a housewife
    graphics fairy
    sew can do
    the girl creative
    c.r.a.f.t 
    craft-o-manic
    the gunny sack
    sumo sweet stuff
    lines across my face
    making the world cuter
    alderberry hill inspired by felicity vintage mauve cowgirl up party serendipity and spice
     knick of time
      kammys korner
    tipjunkie
    at home with k
         creative itch
    my uncommon slice of suburbia
    coastal charm
    home stories a to z
    its overflowing
    elizabeth and co
    teagans travels uncommon debbie does creations real housewifes of riverton adventures of a diy mum
    someday crafts
    trendy tree house
    primp
    free pretty things for you
    ginger snap crafts
    creations by kara
    my repurposed life
    the shady porch
    sew much ado diy dreamer jaqs studio crafty scrappy happy raegun ramblings
    spruce your nest beyond the picket fence
    the shabby creek cottage house of hepworths
    momnivores dilemma creative juice
    from my front porch to yours
    36th avenue
    the vintage farm house lovenotes by lauren the treasurista
    my romantic home
    not so functional housewife
    blissful and domestic
    the shabby nest
    finding fabulous
    creation corner bacon time with the hungry monster little becky homecky marriage from scratch kitchen fun with my 3 sons
    serenity you
    be different act normal
    funky junk interiors
    tatertots and jello
    i cant stop crafting jolly jane nutmeg place rustic crafts &chic decor
    sunday best my 1929 charmer
    nifty thrifty things
    flamingo toes
    delightful order petite hermine
    under the table dreaming i heart nap time
    sisters of the wild west

    You might also like

    • marshmallow roses tutorial

    • decorated plates using a porcelain marker

    • nanaimo bars

    SIGN UP TO GET MY NEWSLETTER

    Reader Interactions

    OLDER
    NEWER

    29 Comments

    1. Jess_LyMi says

      June 8, 2012 at 11:32 pm

      This is so adorable. Thanks for the tutorial. I will have to put this on my craft to-do list!

      xo, Jess
      http://thedelightfulcrafter.blogspot.com

    2. Kristina @ ReMadeSimple says

      June 9, 2012 at 1:14 am

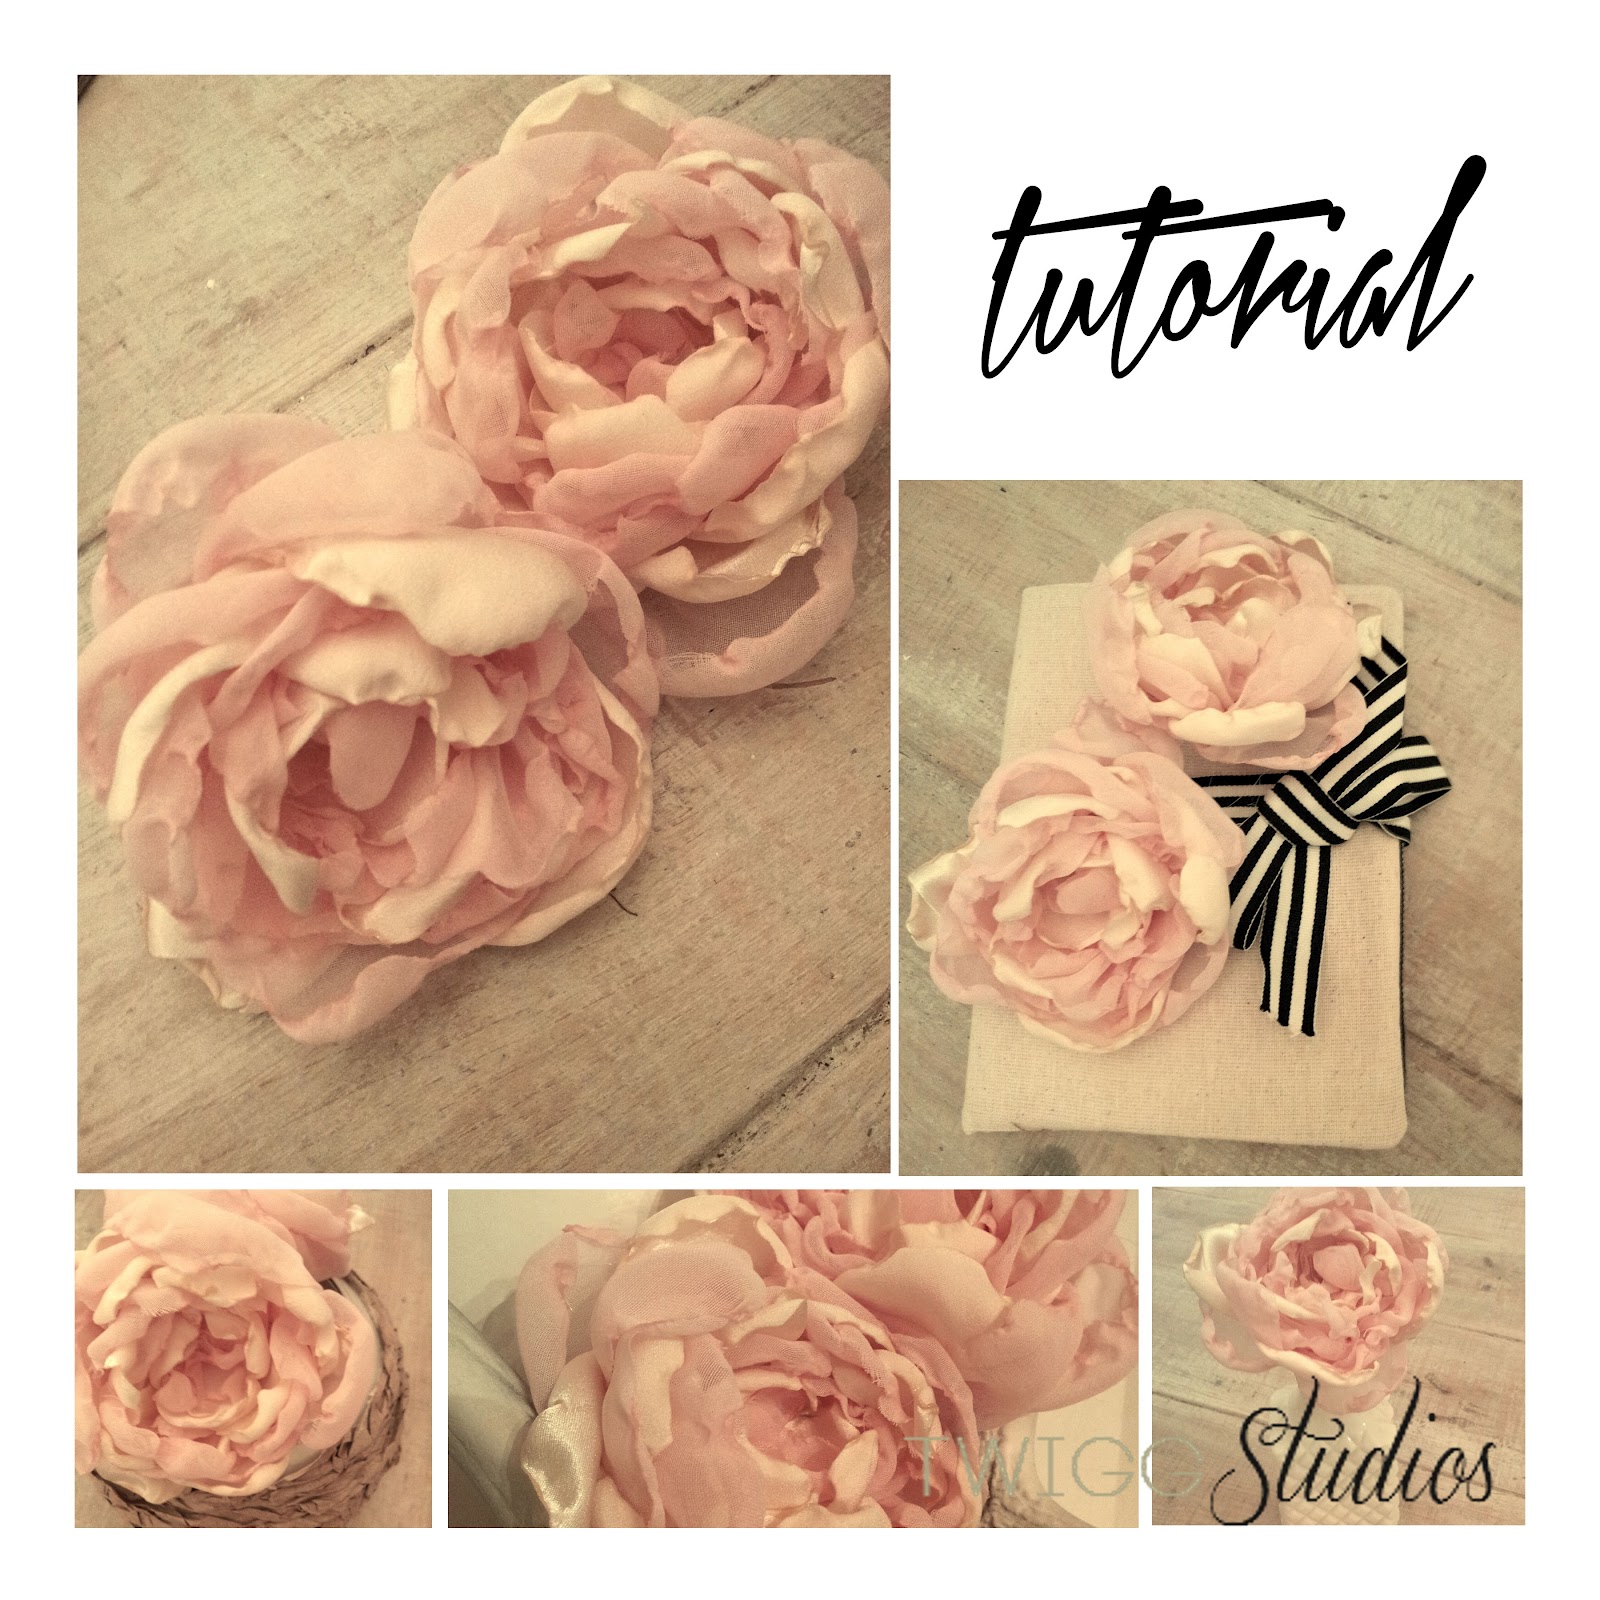
      These are beautiful and realistic looking! Our real peonies are already gone, so I would make these and put them in a vase. Pinned this idea-thanks for sharing 🙂

    3. Carol, The Answer Is Chocolate says

      June 9, 2012 at 2:39 am

      These are so beautiful and they look incredibly real!

    4. The Rosegarden in Malevik says

      June 9, 2012 at 11:33 am

      Lovley job 🙂
      and do not miss…..

      S
      A
      T
      U
      R
      D
      A
      Y

      S
      H
      O
      W

      O
      F
      F

      it is FUN 🙂
      WELCOME
      Håkan ( The Roseman)

    5. Heather says

      June 9, 2012 at 1:55 pm

      WOW Aimee! Love this tute – thanks for sharing! I can see a number of these in a beautiful milk glass or an ironstone vase! Gorgeous!

    6. Simply Bungalow says

      June 10, 2012 at 1:20 pm

      Great tutorial. Can't wait to try it!
      ~Heidi

    7. Danni Baird @ Silo Hill Farm says

      June 11, 2012 at 1:47 pm

      Aimee these are gorgeous! They look so real I can almost smell them! Thanks for such a great tutorial on them as well!

    8. Donna Wilkes says

      June 11, 2012 at 6:45 pm

      Aimee – great tutorial. I can see a swath of these with tulle hanging across a mantel. I just got a huge bag of netting so materials are ready. Hope I don't burn the house down!

      Distressed Donna Down Home

    9. Etcetorize says

      June 11, 2012 at 8:04 pm

      Very pretty! Almost realistic looking. Thanks so much for sharing at Etcetorize this week~

    10. Kylie Helm says

      June 12, 2012 at 1:35 am

      These are beautiful!! I just love fabric flowers. Is there anything better than something so pretty, that will LAST! I love a good bouquet just as much as the next girl, but it makes me so sad when the flowers die! Thank you for the tutorial 🙂

      -Kylie
      absolutelyarkansas.blogspot.com

    11. Joyce - Quilted Nest says

      June 12, 2012 at 8:13 pm

      These I love! Thank you… will be a rainy day project sometime in my future (pinned and waiting…)

    12. Little Miss Maggie says

      June 13, 2012 at 5:12 am

      These are beautiful. I never thought of going to the thrift shop for the silk.

    13. CHRISTMAS PIE CRAFTS says

      June 13, 2012 at 12:29 pm

      Absolutely beautiful, many thanks fro the tutorial

    14. Just Jaime says

      June 14, 2012 at 12:17 am

      Beautiful!! I they are so soft and lovely!

    15. Rose :: Fine Craft Guild .com says

      June 14, 2012 at 9:18 pm

      really lovely. want to invite you to come share this and participate in our linky party here: http://www.finecraftguild.com/party/

    16. Janine LaTulippe says

      June 15, 2012 at 3:40 pm

      These a great. Do you have any suggestions on how to put a stem on them and make a bouquet? Also, I am a little confused about how to sew them together. Do I just wing it? I am a new follower. Hope to see you at True Aim.

    17. Christine says

      June 15, 2012 at 6:44 pm

      You made the flowers from fabric!? COOL!!! They looks great!!

      Thanks so much for sharing at The DIY Dreamer.. From Dream To Reality!

    18. carolyn marshall says

      June 17, 2012 at 3:50 am

      Hi! I'm visiting from Fantabulous Friday. I love these fabric flowers. They're so cute!! Great job.

      Carolyn
      {my simple messterpiece}

    19. Sharon @ Elizabeth & Co. says

      June 18, 2012 at 2:28 am

      These look so real, it's amazing!

    20. Cultivate Life in Joy says

      June 18, 2012 at 6:15 am

      These are gorgeious..I love peonies..thank you for sharing the tutorial..you are the best

    21. DebbieDoesCreations says

      June 18, 2012 at 6:08 pm

      Gorgeous as always. Thanks so much for sharing at Toot Your Horn Tuesday 🙂

    22. Alissa@CraftyEndeavor says

      June 18, 2012 at 10:48 pm

      Love these flowers! just pinned it

    23. Sharon @ Elizabeth & Co. says

      June 19, 2012 at 12:10 pm

      Hi Aimee, we featured you (twice!) today at our Be Inspired link party. Thanks so much for sharing with us!

    24. Good Time Charlie says

      June 19, 2012 at 6:14 pm

      These are so gorgeous!!! I am thinking of raiding my local Goodwill for all the silk type blouses. Thanks for sharing, pinning this!

    25. AngelCakes says

      December 10, 2012 at 8:35 pm

      These are so beautiful! I decided to give them a go and I wanted to get some clarification on how to sew the petals together. Do you sew them to eachother starting from the outside petals, going inward? Or do you just stack them up and sew through the center? It's hard for me to tell from the picture.

      Thanks!

      • Shannon says

        February 21, 2013 at 8:02 pm

        Did you ever figure it out? I'm having trouble figuring it out myself so I just have a bunch of ready to go petals!

    26. LizardCannon says

      January 12, 2013 at 3:10 am

      I hope you will correct this tutorial. 100% silk will not curl with heat, only burn. Now i have two chopped up blouses 🙁 Good news is anything synthetic works beautifully !

    27. twiggstiudios says

      December 8, 2013 at 11:58 am

      You arrange the largest petals in a flower shape then take the needle through them all at once. Then do the same with the next layer of petals and add it on top of the larger layer then move on tl the smaller petals

    28. Anonymous says

      April 27, 2014 at 4:14 am

      Great tutorial, but I just wanted to point out that the fabric you used is synthetic satin. Silk refers to fabric made from the fibers of silkworms and isn't synthetic 🙂

    Primary Sidebar

    Hi there, I'm Aimee

    A food and photography lover. Welcome to Twigg studios. If you would like to find out more about me then head to my bio.

    LOOKING FOR SOMETHING?

    free visual storytelling guide

    Categories

    • baking (80)
    • cake (27)
    • dinner (14)
    • Drinks (2)
    • pasta (11)
    • photography (1)
    • recipe (186)
    • sweet (52)
    • tips (6)
    • Travel (6)
    • Uncategorized (827)
    Visit Twiggstudios's profile on Pinterest.

    Recent Posts

    • Hazelnut brown butter speculaas cookies
    • Grape and roasted hazelnut frangipane galette
    • Zesty vanilla Victoria sponge with rose macerated strawberries
    • Homemade Elderflower liqueur
    • Roast Strawberry Daiquiri & Pavlova
    • E-mail
    • Facebook
    • Instagram
    • Pinterest
    • Twitter

    LOOKING FOR SOMETHING?

    Visit Twiggstudios's profile on Pinterest.

    Recent Posts

    • Hazelnut brown butter speculaas cookies
    • Grape and roasted hazelnut frangipane galette
    • Zesty vanilla Victoria sponge with rose macerated strawberries
    • Homemade Elderflower liqueur
    • Roast Strawberry Daiquiri & Pavlova

    HELP

    • HOME
    • ABOUT ME
    • CONTACT ME
    Get in the know.
    Sign up with your email address to receive news and updates.
    As a welcome you will receive my presentation on visual storytelling
    Thank you for subscribing!

    INFO

    • E-mail Me

    twigg studios © 2025 - DESIGNED BY HERPARK STUDIO