• Skip to primary navigation
  • Skip to main content
  • Skip to primary sidebar
  • twigg studios

    A British baking blog, food photography

    • Home
    • BLOG
    • WORKSHOPS
    • SHOP
    • PORTFOLIO
    • Contact
    • hire me
    • ABOUT ME
    February 18, 2013

    robin egg marshmallow tutorial

    Uncategorized

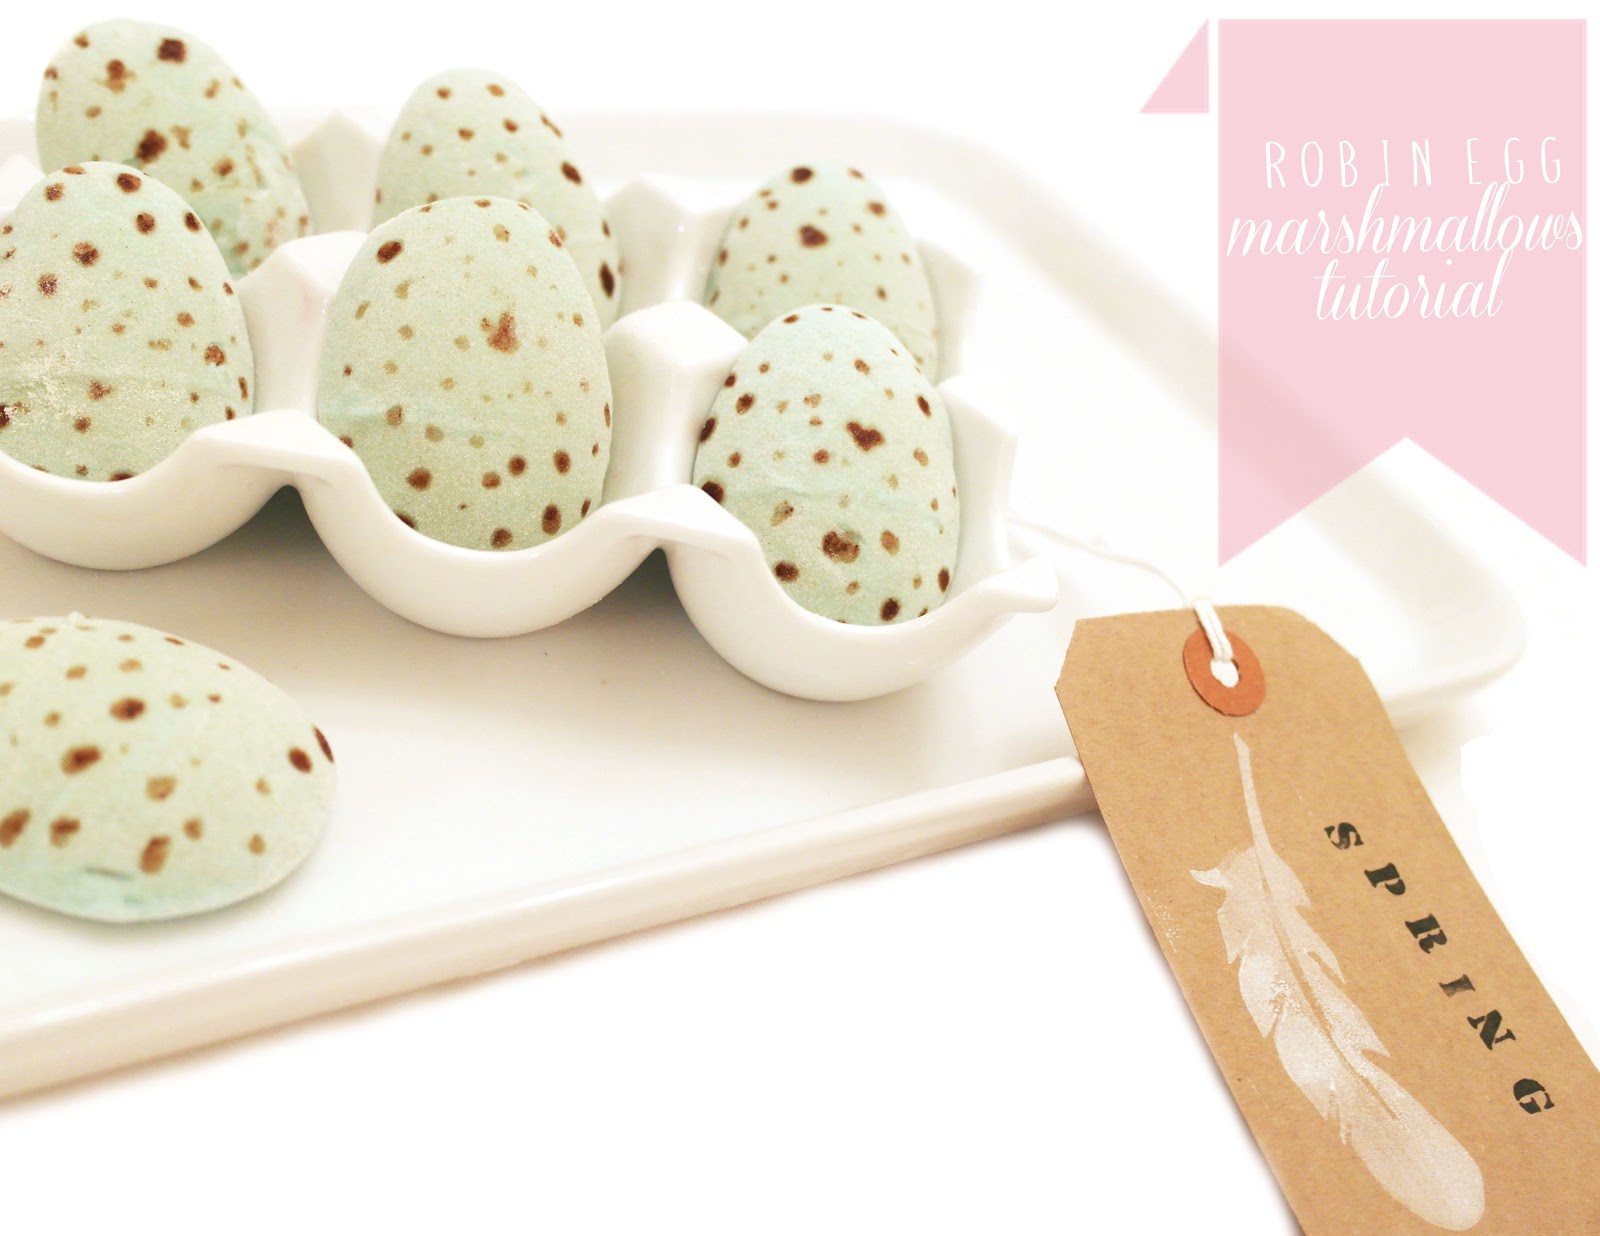
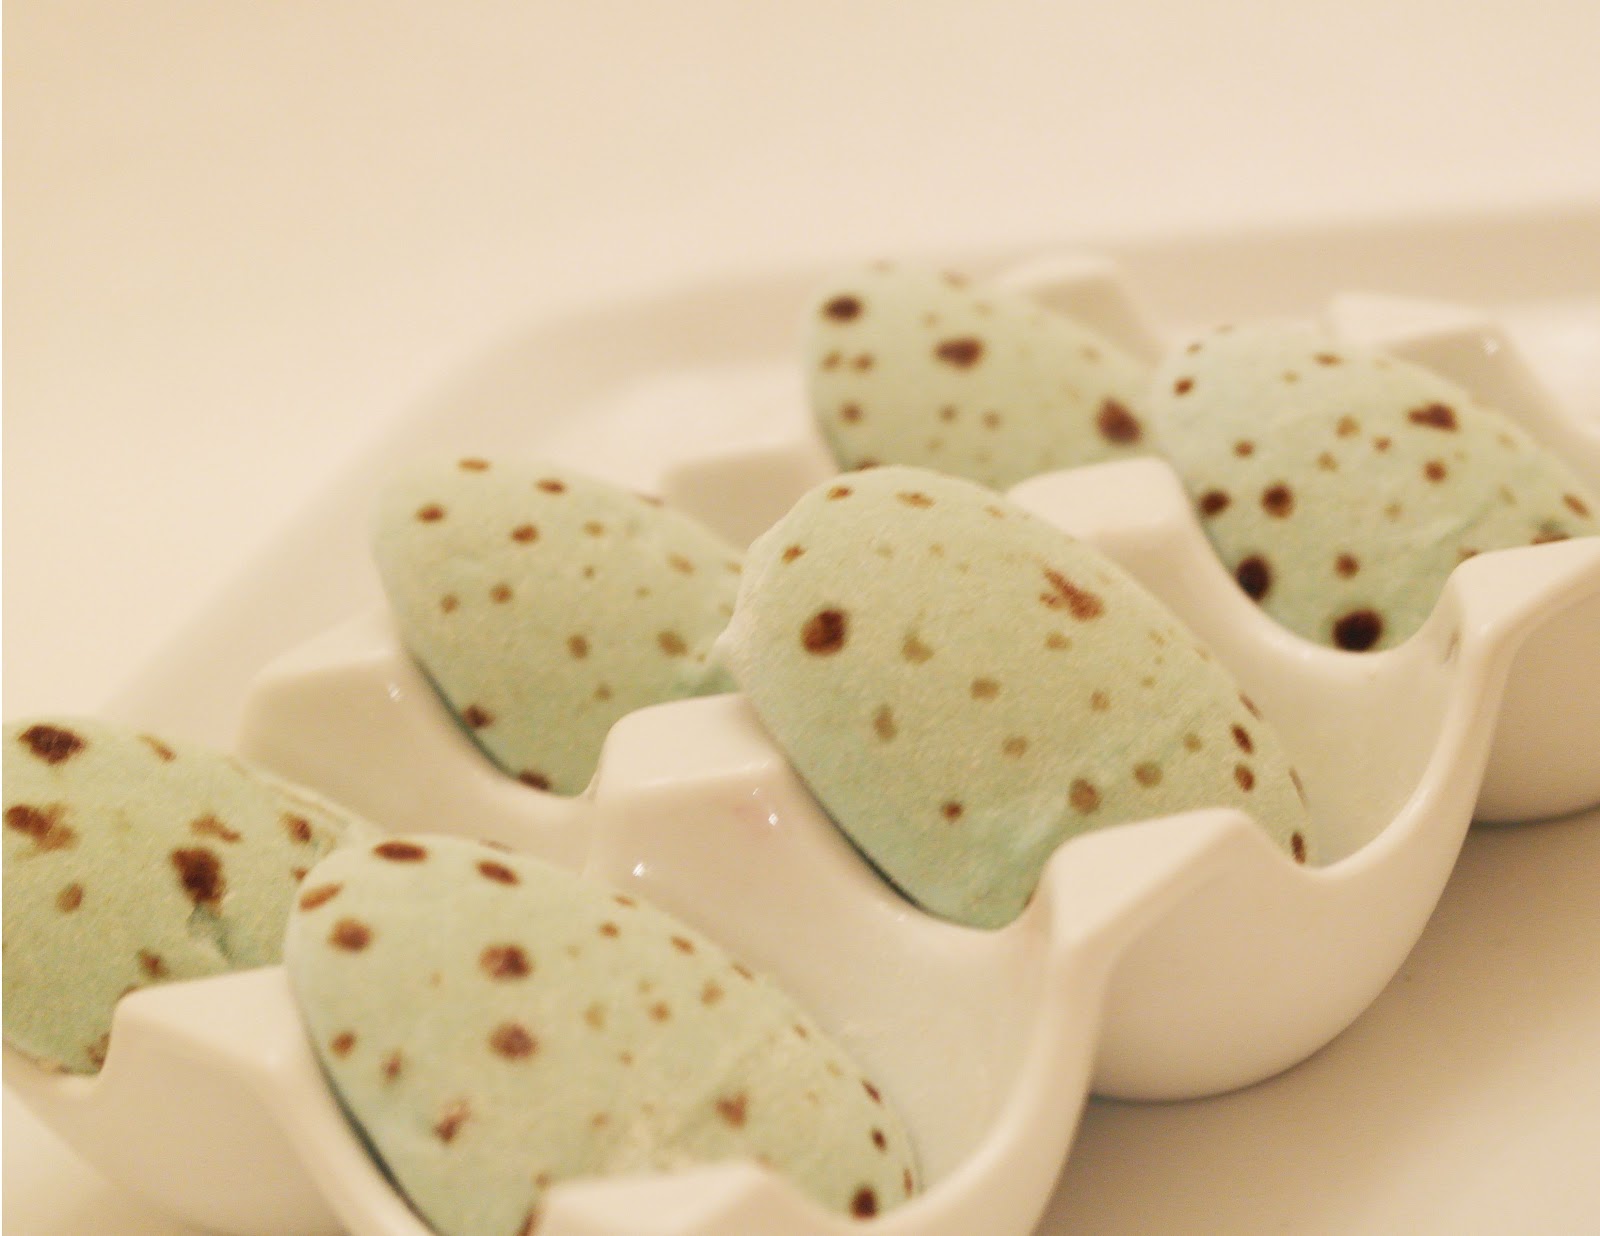
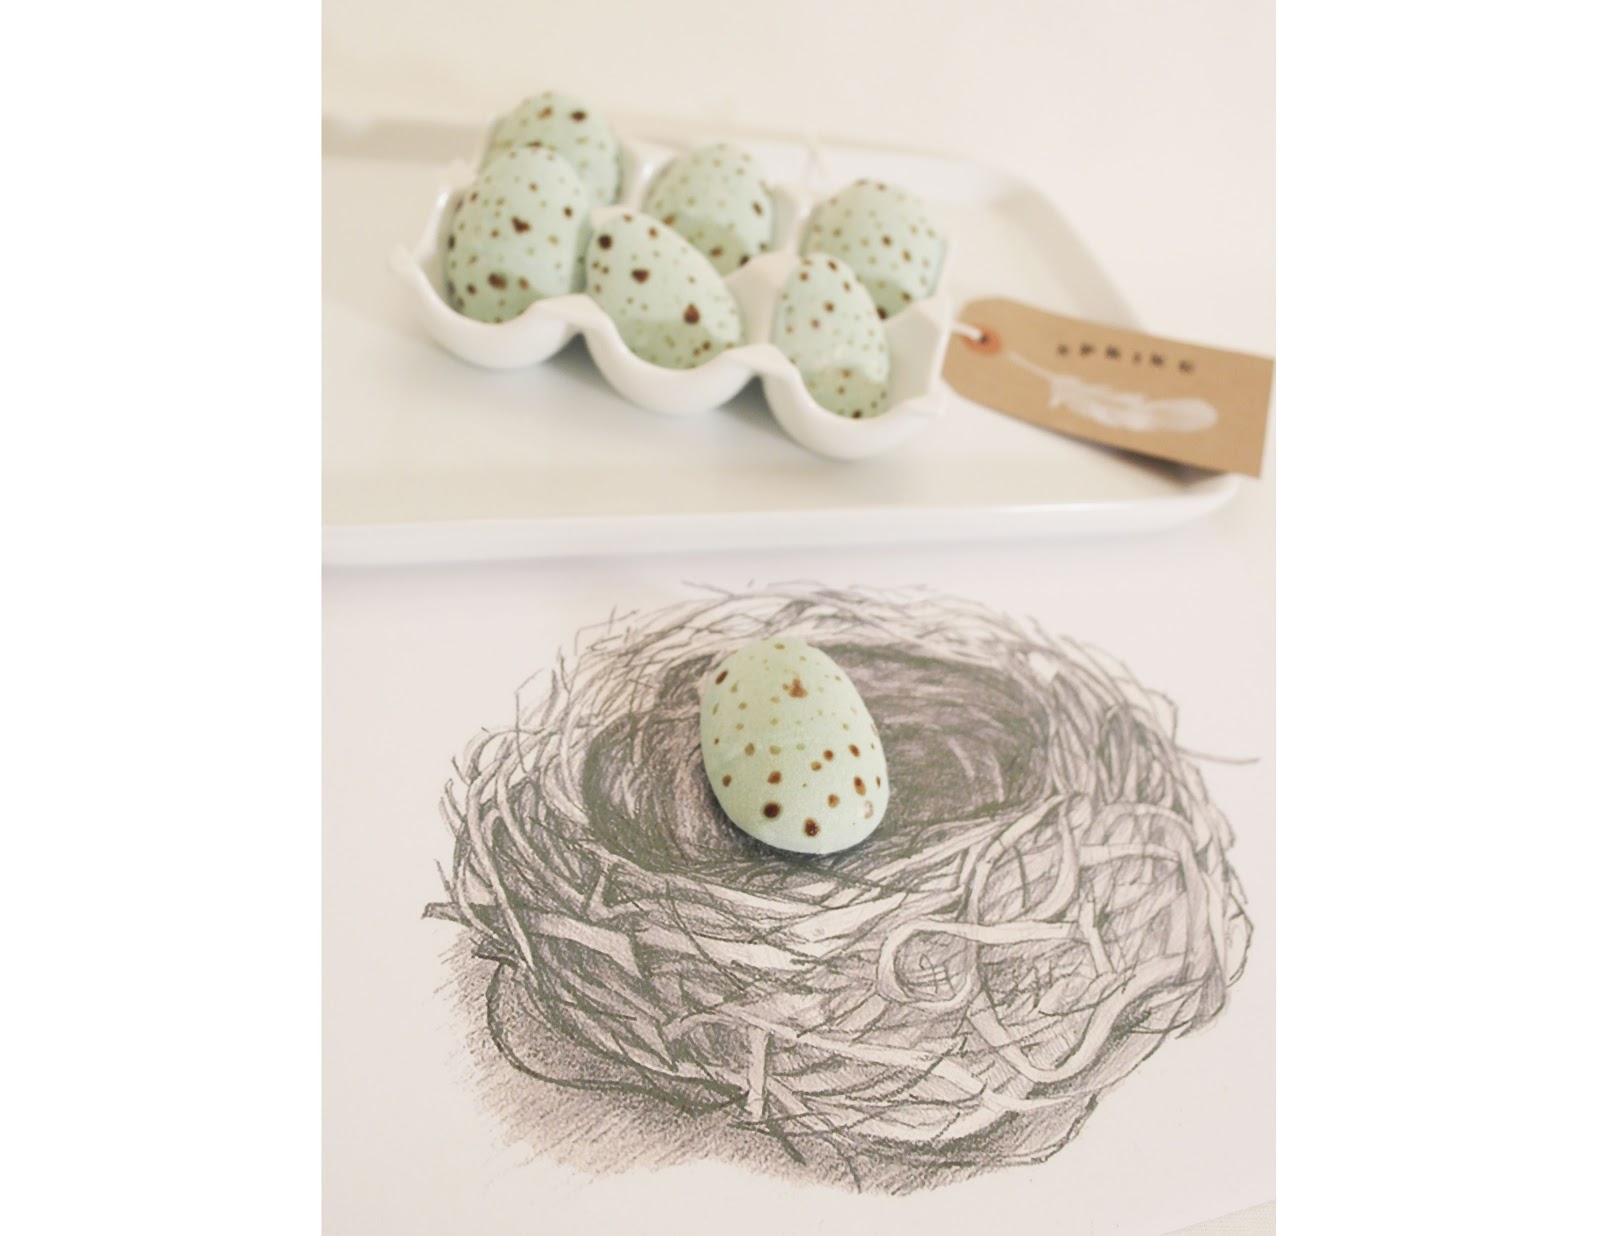
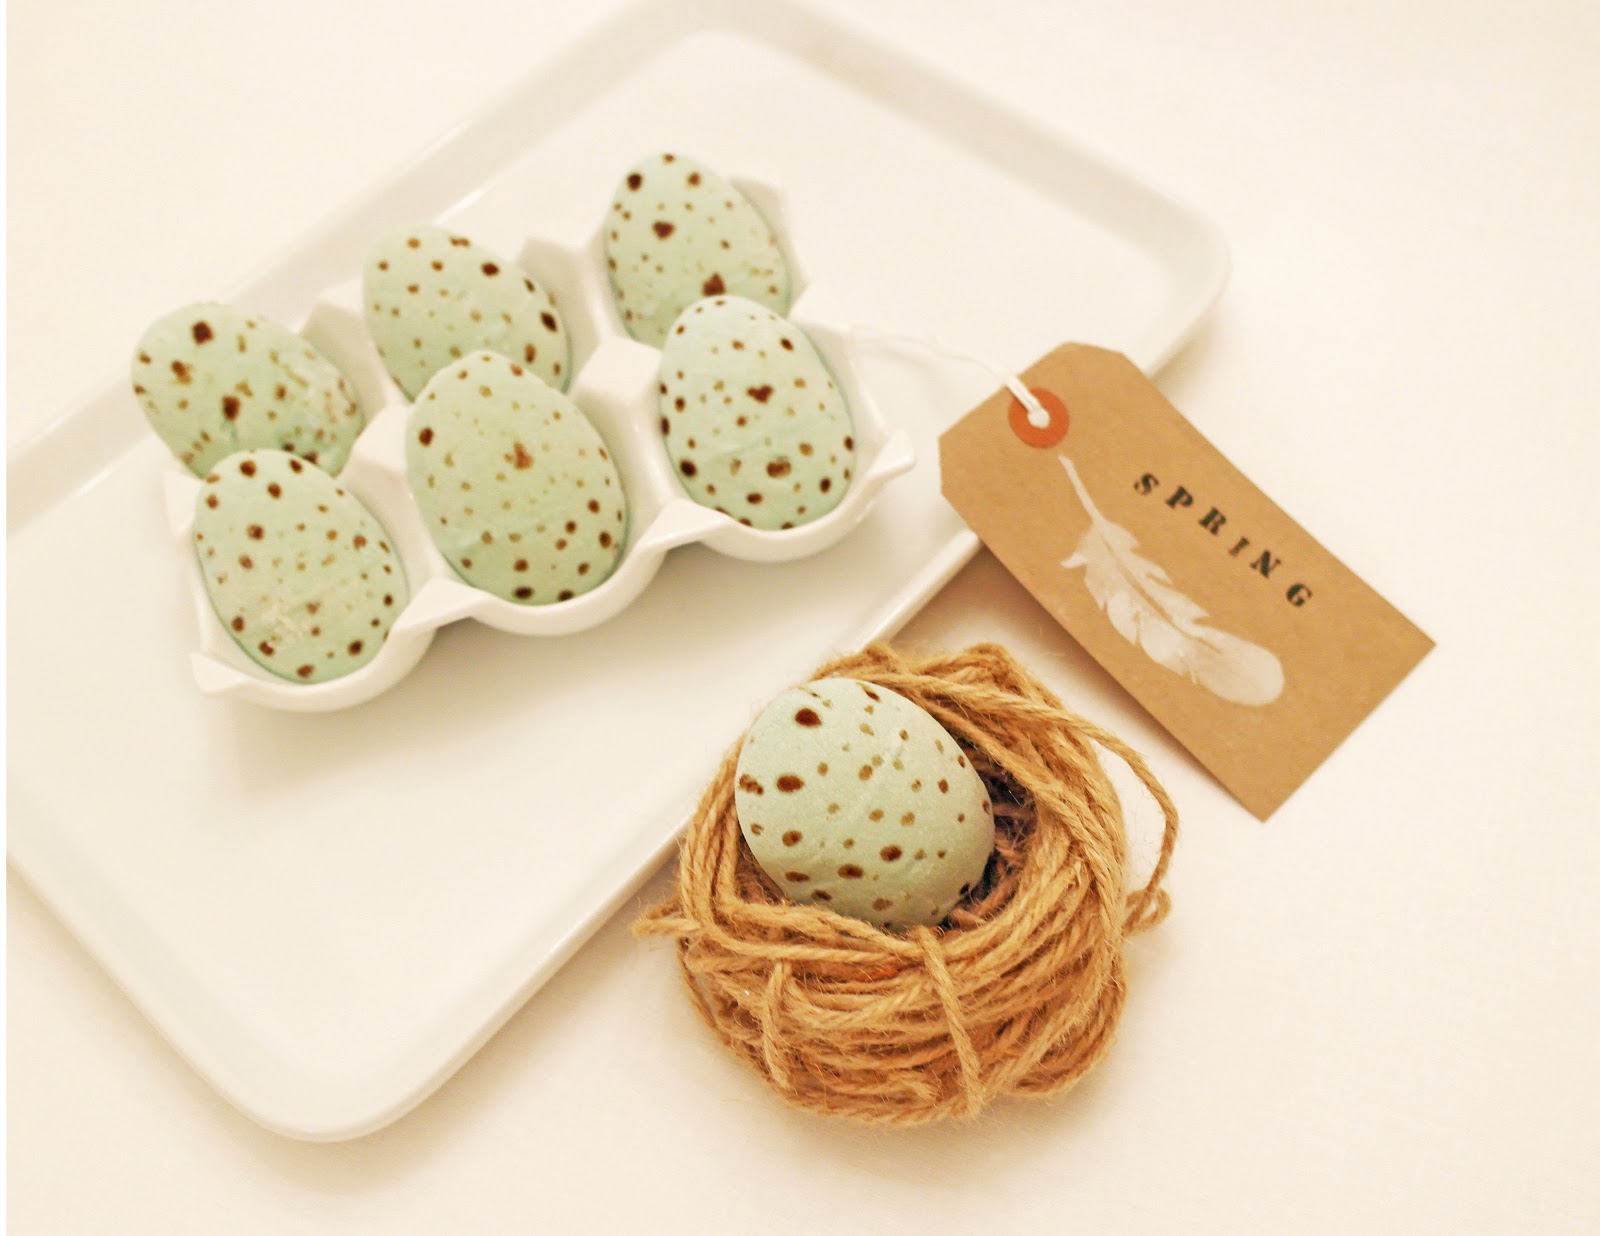
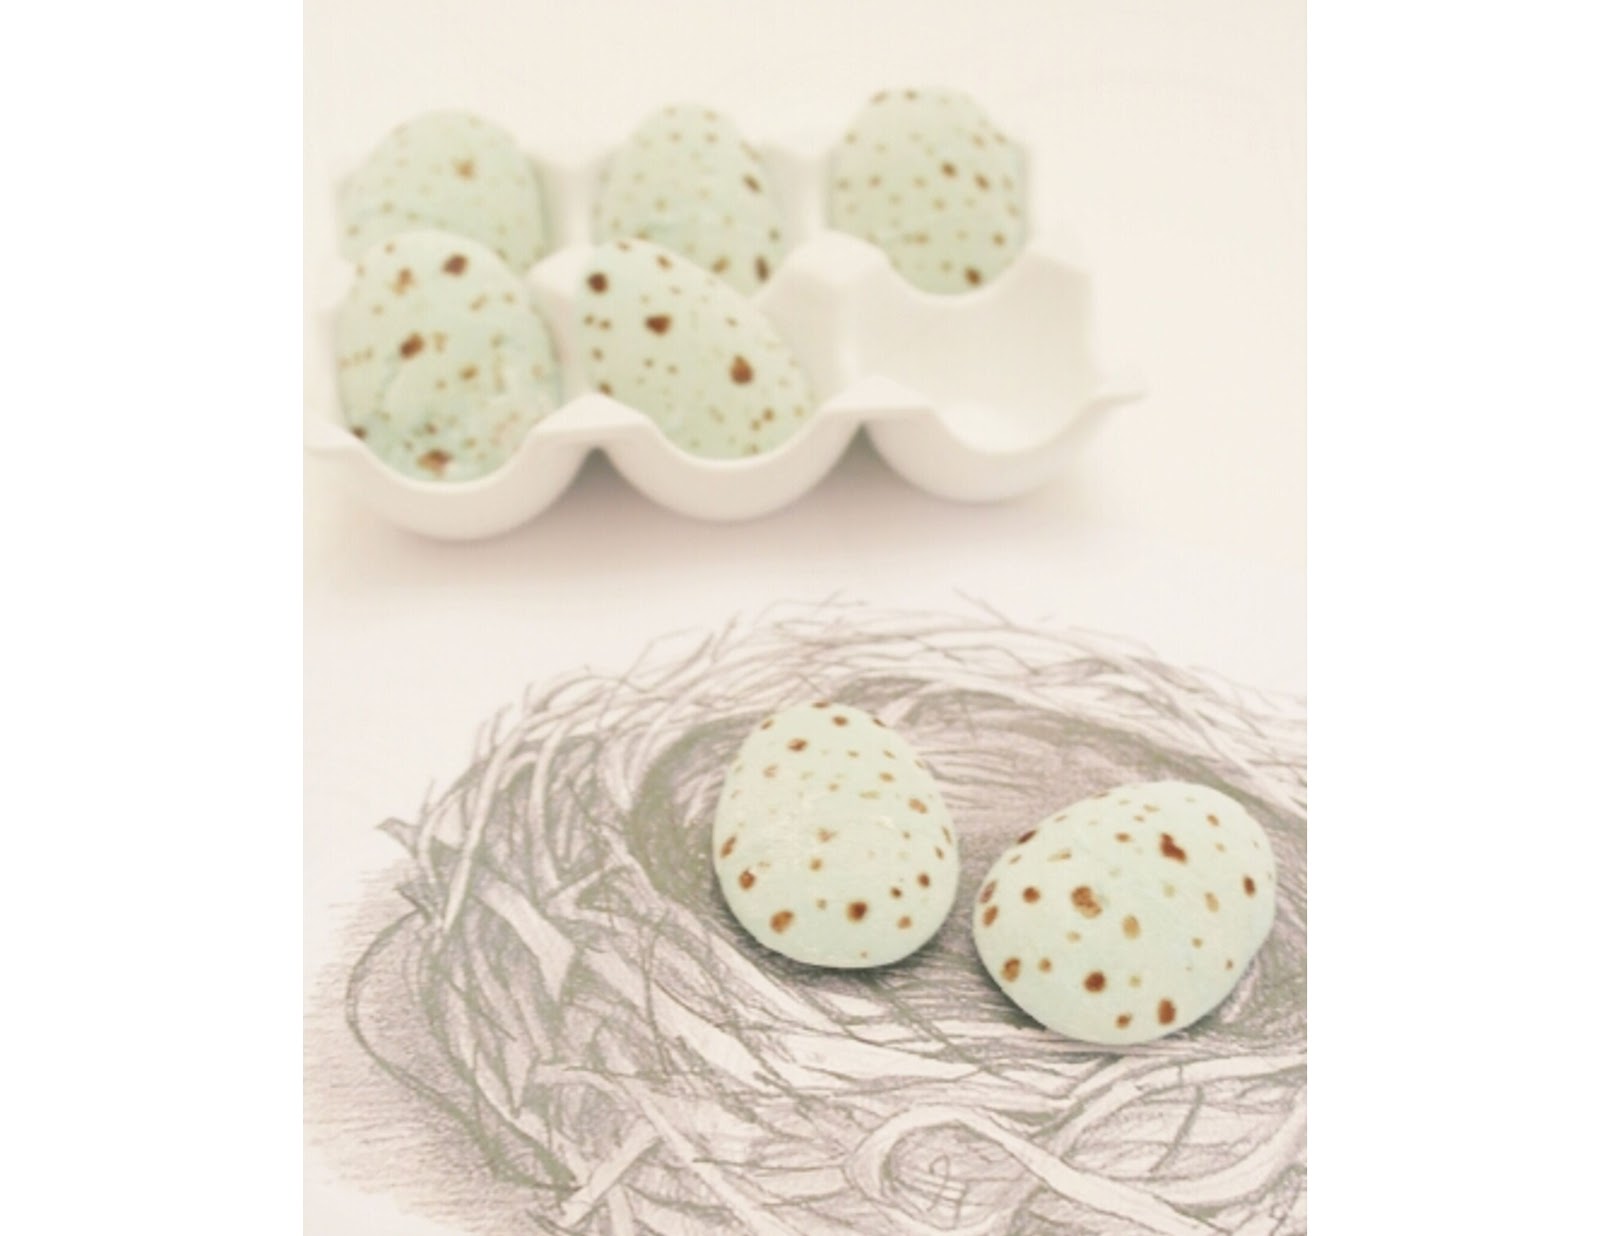
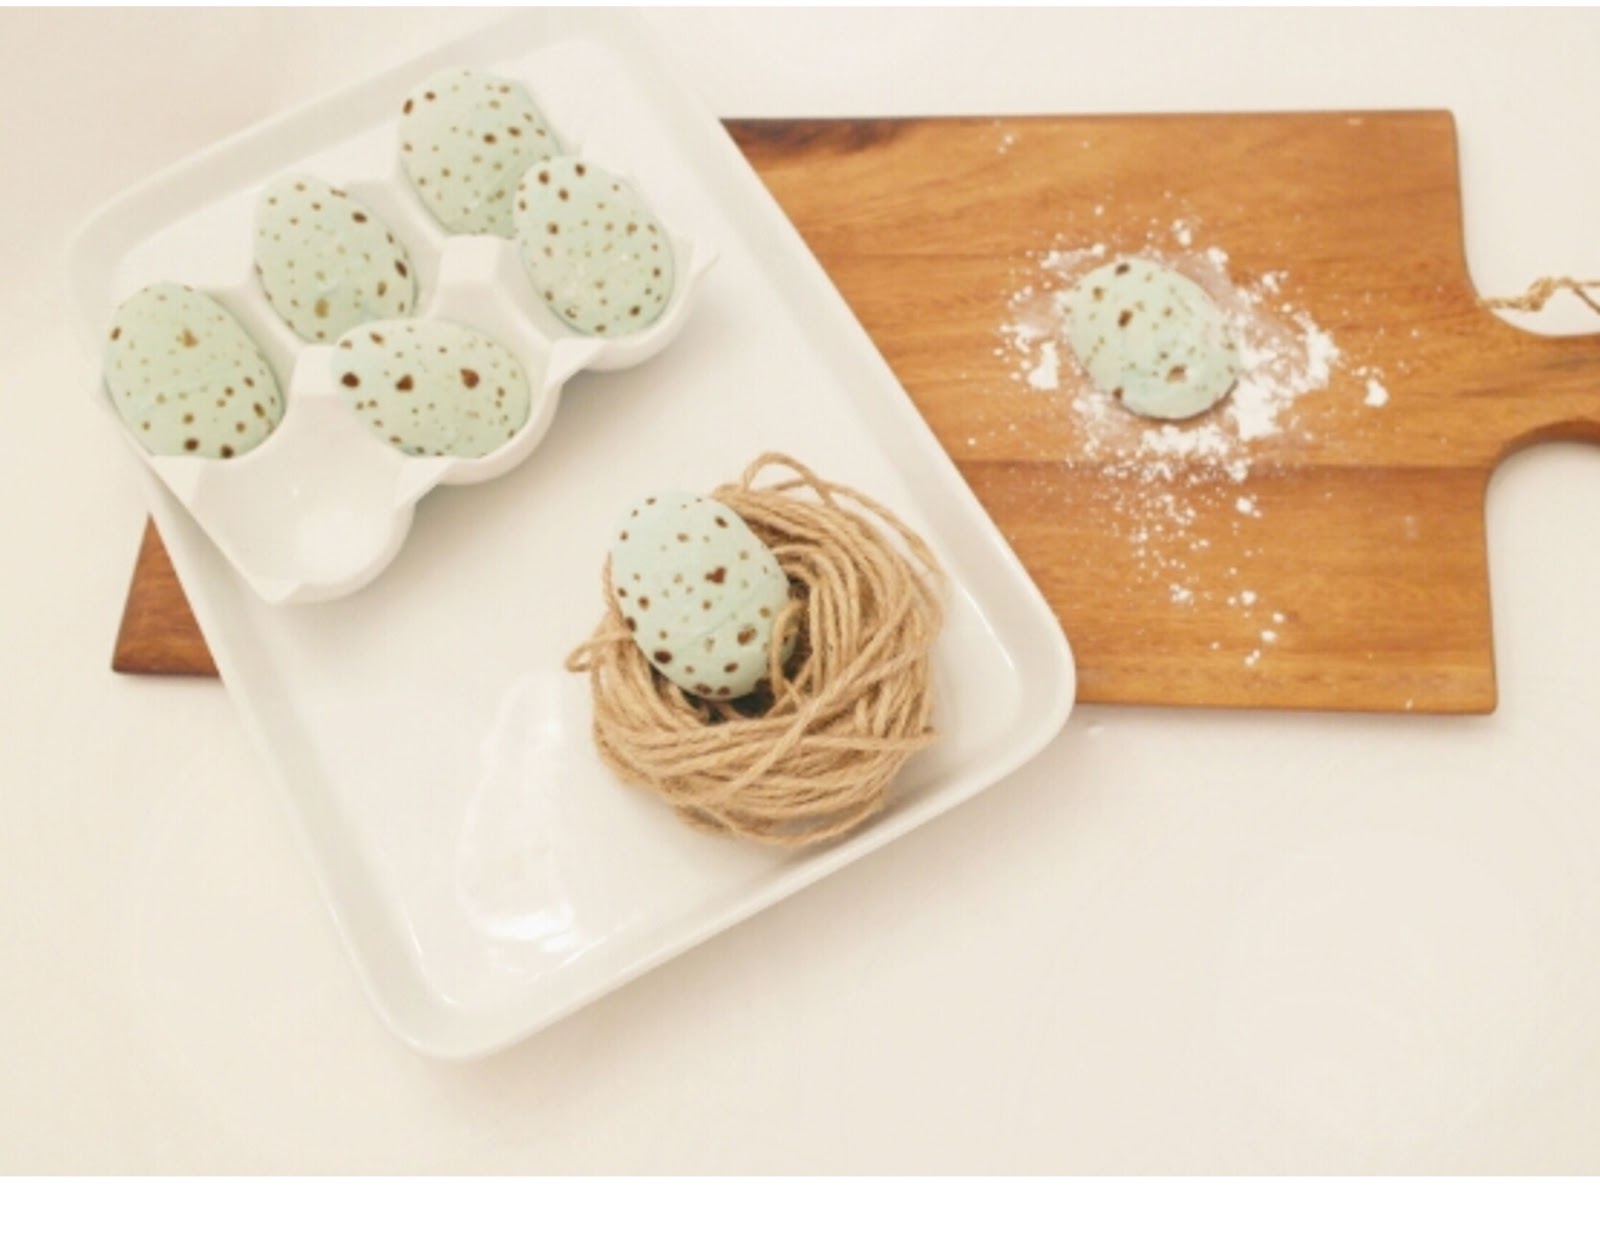
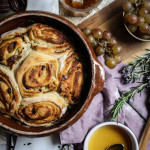
    i know its still February but spring is most defiantly in the air so i was inspired to make these egg shaped marshmallows. it was my first time ever making marshmallows so if i can do it then you can too.

    recipe
    9 sheets of leaf gelatine
    1 tbsp liquid glucose
    200ml water
    2 large egg whites
    1 tea spoon vanilla
    450g sugar
    icing sugar
    blue food colouring

    equipment
    bag of flour for mould
    plastic egg
    2 dishes
    mixing bowl
    thermometer
    heavy pan
    whisk
    metal jug
    paint brush and coca powder for dots

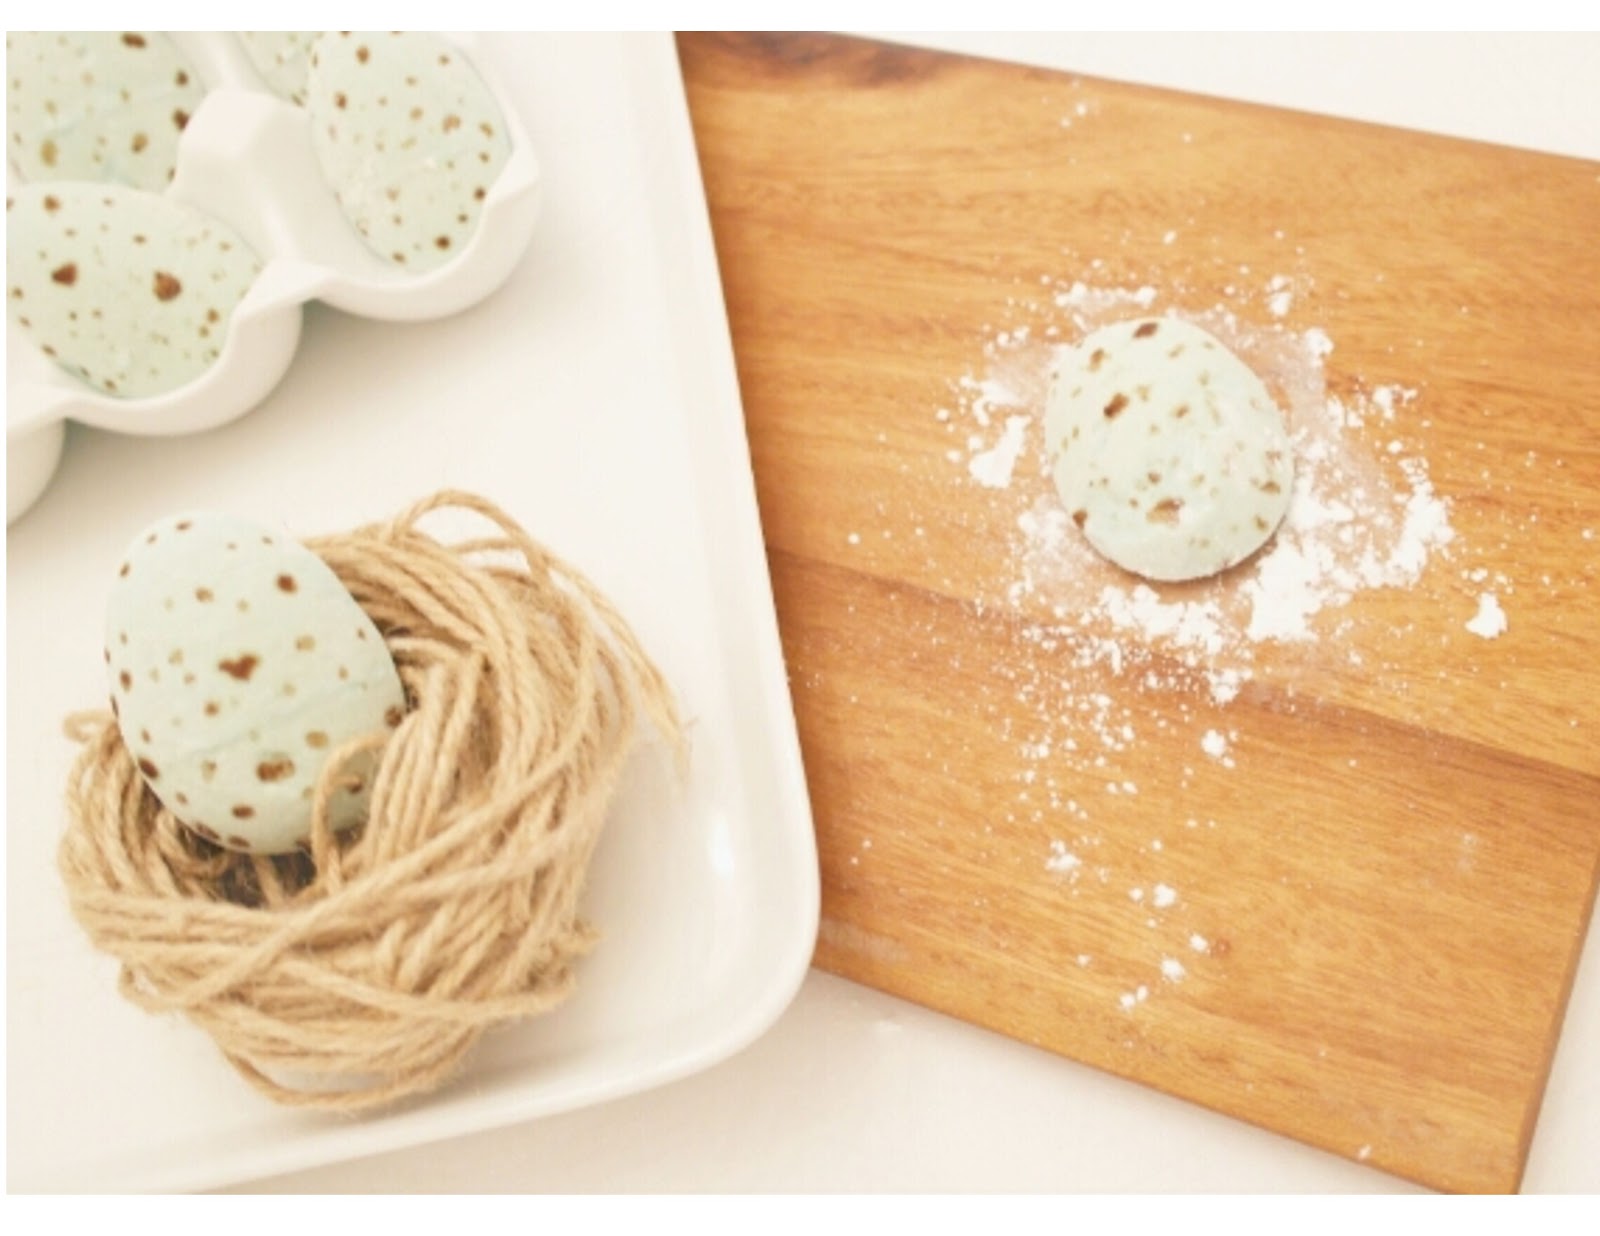
    before you start any thing, you need to get your dishes ready for the marshmallow, this recipe makes allot so i did some egg shaped marshmallows and the rest i poured in to a dish that you can then chop up as you like. to make the mould fill the dish with flour and press the plastic egg in to it to create egg shapes. grease the other dish and sprinkle it with icing sugar.
    to make the marshmallows first soak the leaf gelatin in 140ml of the 200ml water and put the other 60mls into the pan. put the gelatin to one side to soak, then in the pan with the water add the sugar, liquid glucose bringing to the boil for about 12mins until it reaches 127c on your thermometer
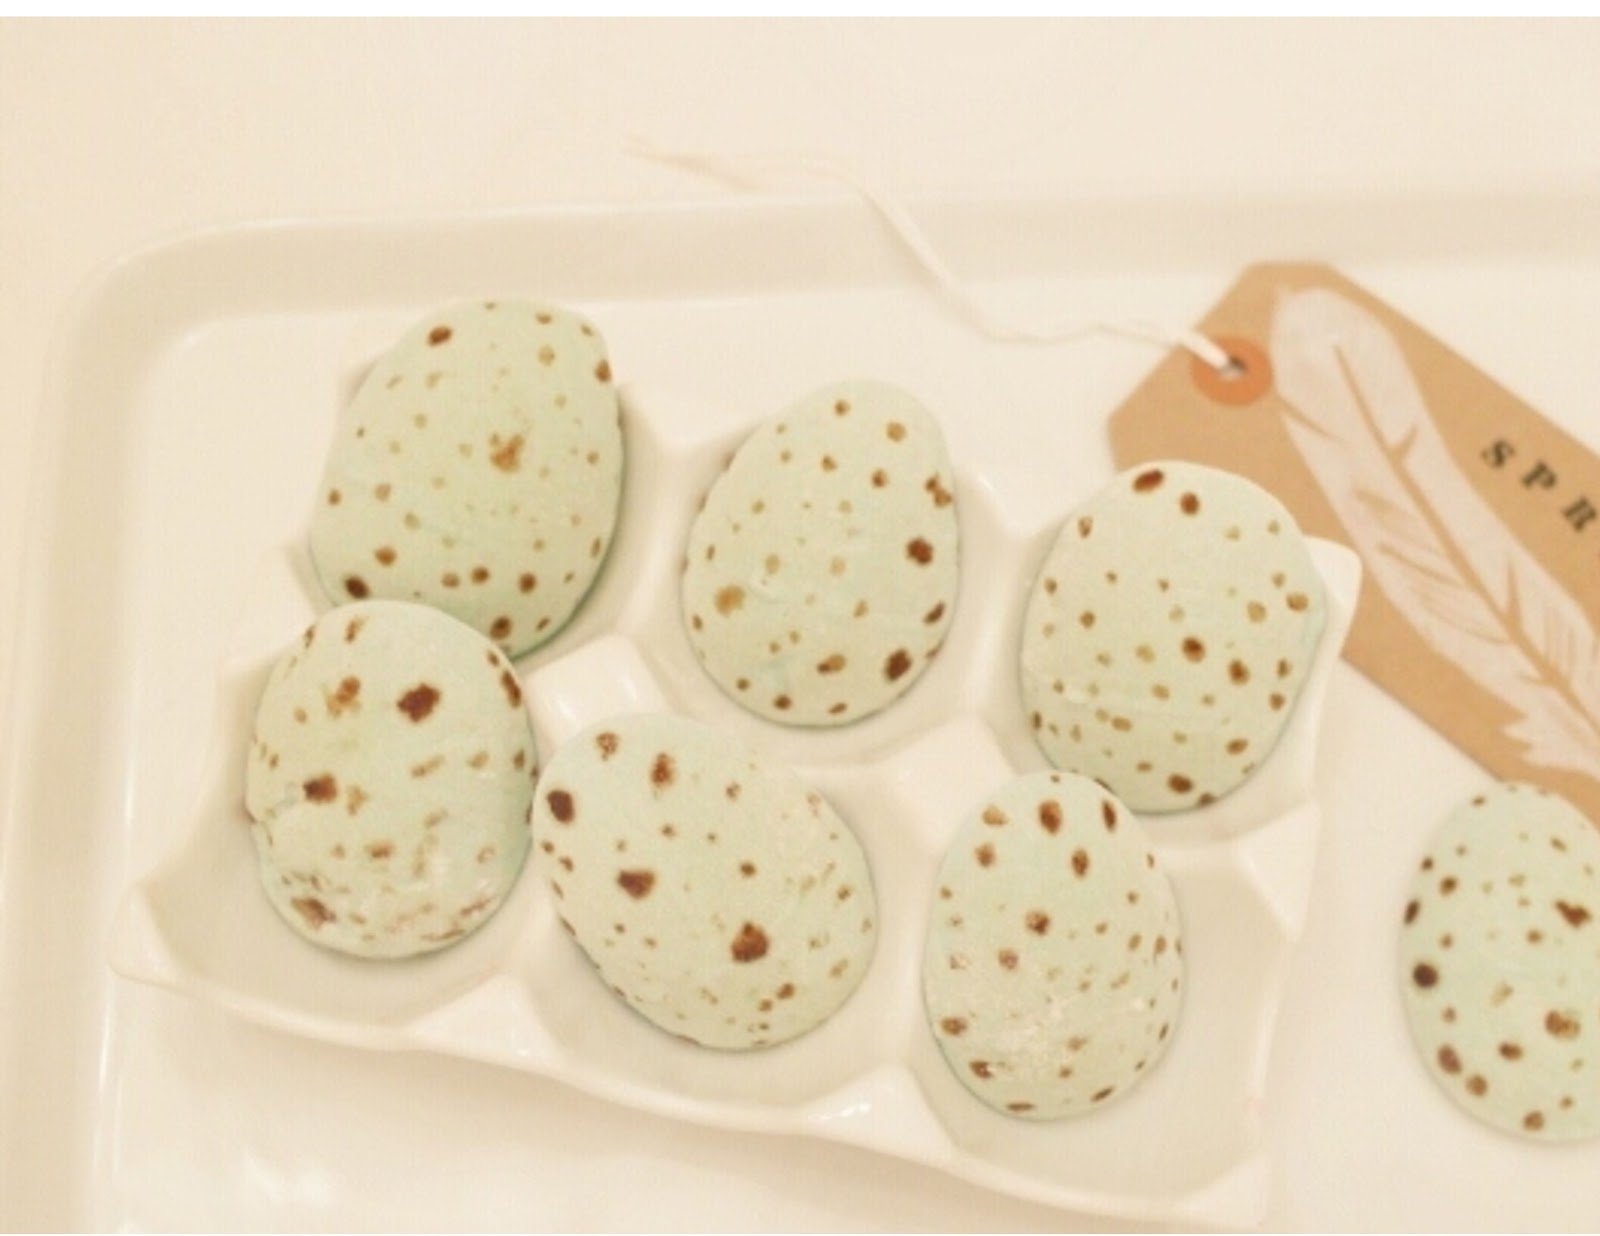
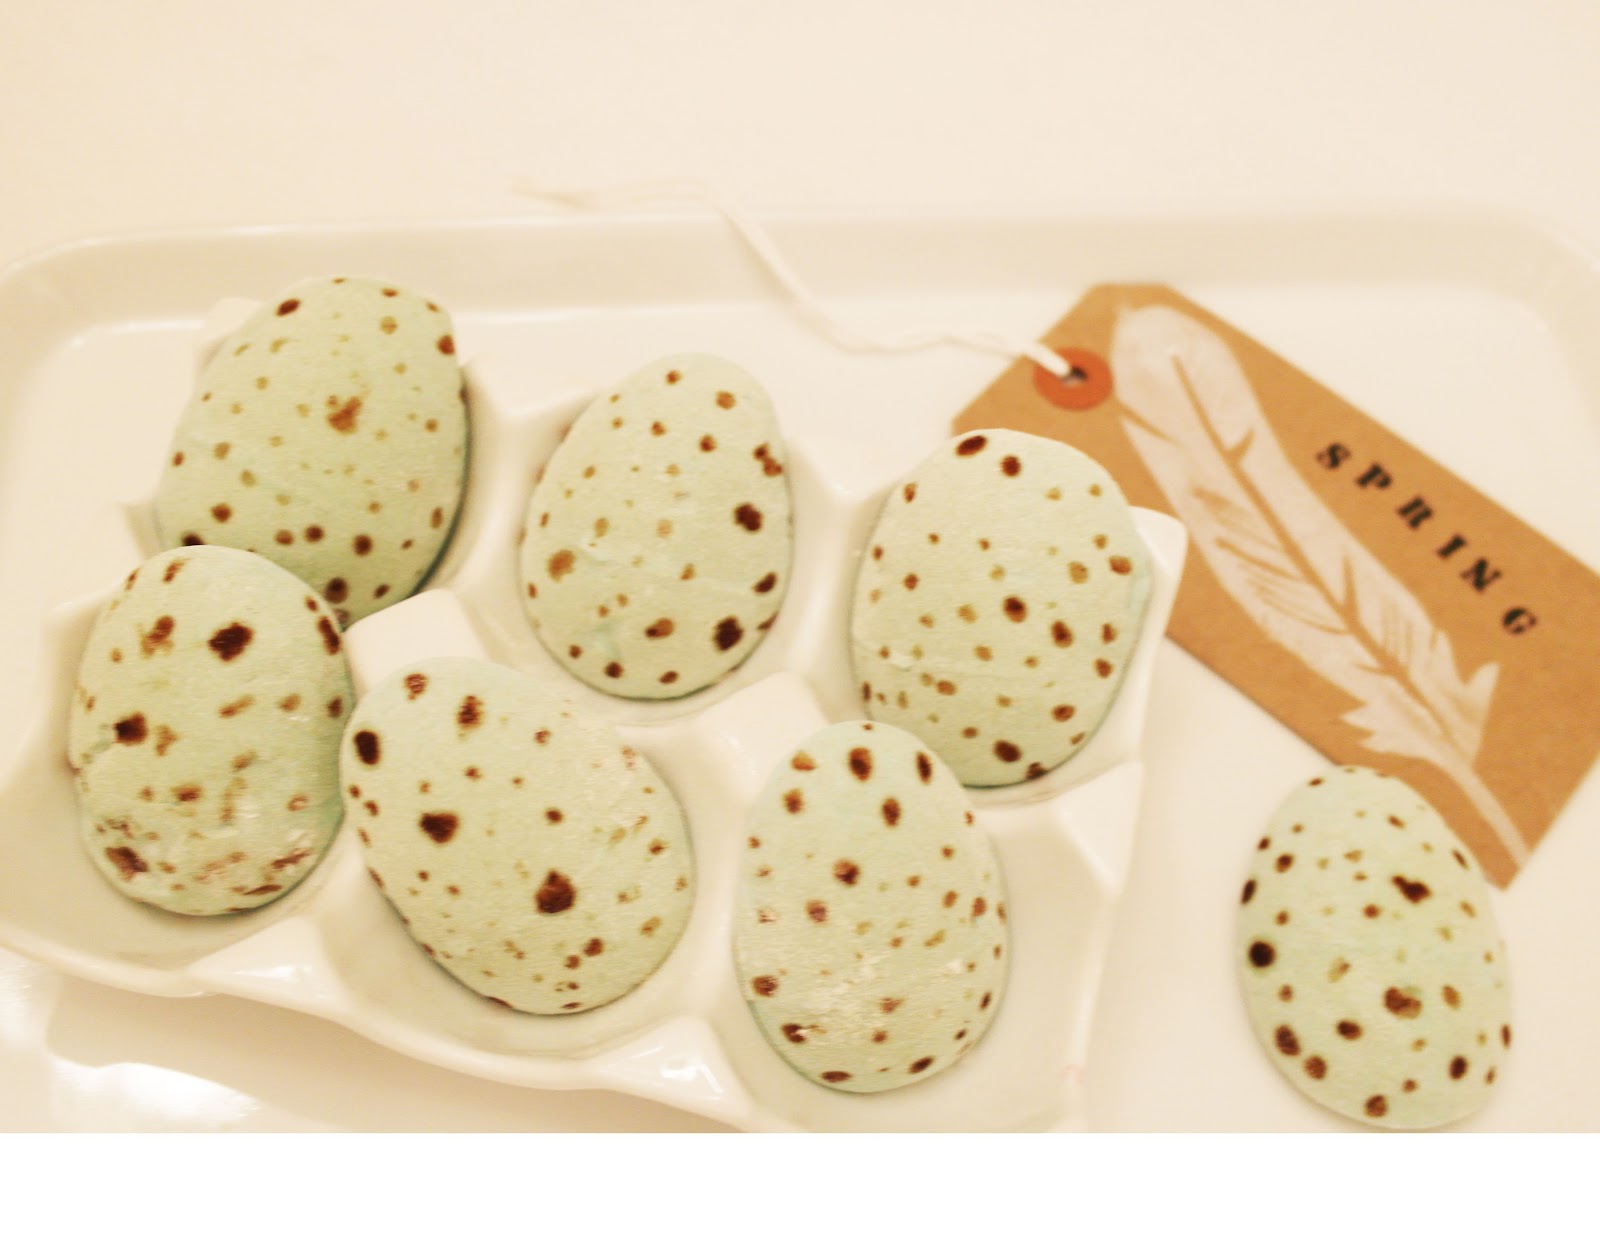
    then gently slide in the gelatin, with the water and stir until the gelatin has dissolved then turn off the heat and pour the mixture into a metal jug. in a mixing bowl whisk the two egg whites until they are fluffy, then pour in the mixture in the jug, whisking it continuously as you are pouring it. then keep whisking the mixture and add the vanilla and blue colouring. keep whisking for about 5-10 minutes until it becomes thick and shiny. then gently spoon it into the egg moulds and pour the remaining mixture into the other dish. cover the eggs with some more flour and leave to set. the eggs will be set in about an hour, the larger dish of marshmallow is best to leave for longer, then you can cut it and dip it in icing sugar (you could always use an egg shaped cookie cutter instead of doing the flour mould). to do the dots, brush the flour off the eggs and put some cocoa powder in a small tub and add a few drops of water, then just paint on the dots.

    i got the idea to use a flour mould from here


    Photobucket

    sew chatty
    etcetorize
    everything under the moon
    not just a housewife
    graphics fairy
    sew can do
    the girl creative
    c.r.a.f.t 
    craft-o-manic
    the gunny sack
    sumo sweet stuff
    lines across my face
    making the world cuter
    alderberry hill inspired by felicity  vintage mauve  cowgirl up party  serendipity and spice home maker on a dime
     knick of time
      kammys korner
    tipjunkie
    at home with k
         creative itch
    my uncommon slice of suburbia
    coastal charm
    home stories a to z
    its overflowing
    elizabeth and co
    teagans travels  uncommon  debbie does creations  real housewifes of riverton adventures of a diy mum  vintage wanna bee  the kurts corner  the winthrop chronicles  pinkopotamus a diamond in the stuff  embracing change  our thrifty ideas crafty confessions  naptime delights
    someday crafts
    trendy tree house
    primp
    free pretty things for you
    ginger snap crafts
    creations by kara
    my repurposed life
    the shady porch
    sew much ado diy dreamer  jaqs studio  crafty scrappy happy  raegun ramblings southern lovely  the gilded hare  restore interiors savvy southern style faded charm boerman ramblings
    the ny melrose family  i gotta create 52 mantels   the artsy girl connection  spruce your nest  beyond the picket fence
    the shabby creek cottage  house of hepworths
    momnivores dilemma creative juice
    from my front porch to yours
    36th avenue
    the vintage farm house  lovenotes by lauren the treasurista live laugh rowe  delightful order
    my romantic home
    not so functional housewife
    blissful and domestic
    the shabby nest
    finding fabulous
    creation corner  bacon time with the hungry monster  little becky homecky  marriage from scratch  kitchen fun with my 3 sons
    petites passions
    liz marie blog blissful bucket list
    live laugh love craft
    a little knick knack
    a shabby art boutique
    serenity you family ever after
    be different act normal
    funky junk interiors
    tatertots and jello
    i cant stop crafting  jolly jane nutmeg place  rustic crafts &chic decor  polkadot pretties  too much time on my hands
    cherished treasures sunday best my 1929 charmer
    nifty thrifty things
    flamingo toes
    petite hermine
    under the table dreaming  i heart nap time
    sisters of the wild west
    diy show off

    You might also like

    • quail egg candles and blue dyed lace egg

    • pottery barn pillow knock off tutorial

    • muscat grape honey and nut sourdough rolls

    SIGN UP TO GET MY NEWSLETTER

    Reader Interactions

    OLDER
    NEWER

    34 Comments

    1. Anne says

      February 18, 2013 at 7:46 pm

      You are amazing!Those are too beautiful to eat!Such lovely photos too!Thank you for sharing!
      xx
      Anne

    2. Monsterscircus says

      February 18, 2013 at 8:33 pm

      Oh Aimée, that really a very original idea! A delicious spring treat! Thank you so much for both tutorial and idea!

    3. Donna Wilkes says

      February 18, 2013 at 9:36 pm

      So creative and cute! They look like real eggs!

    4. Stone Cottage Adventures says

      February 18, 2013 at 10:58 pm

      Oh, how very pretty! -Marci @ Stone Cottage Adventures

    5. Brenda says

      February 19, 2013 at 11:56 am

      Love these!! Thanks for sharing 🙂

      Brenda
      ChattingOverChocolate.blogspot.com

    6. Danielle says

      February 19, 2013 at 1:27 pm

      These are so sweet! Would love you to share them at my link party if you have a chance – Silver Pennies Sundays: http://www.findingsilverpennies.com/2013/02/silver-pennies-sundays-link-party.html

    7. Smart School House says

      February 19, 2013 at 2:10 pm

      This is so coooooool! But, you are much more artistic than I am- so my only hope is that I can get mine to come out looking somewhat similar. Totally pinned this:)

      Kelly from Smart School House
      Facebook: http://www.facebook.com/SmartSchoolHouse
      Google+https://plus.google.com/u/0/111902135882668872474/posts

    8. Katie B. of HousewifeHowTos.com says

      February 19, 2013 at 4:10 pm

      Oh, I love homemade marshmallos, and these are so adorable! I'd love if you'd come join my How To Tuesday link party, too.
      http://housewifehowtos.com/link-party-2/how-to-tuesday-link-party-9/

    9. Wanda Ann Olsen says

      February 19, 2013 at 6:57 pm

      Aimee,
      Thank you for sharing at Memories by the Mile. These are so cute and sweet. Your pictures are beautiful.
      xoxo
      Wanda Ann @ http://www.memoriesbythemile.com/

    10. Jessica Chong says

      February 19, 2013 at 8:11 pm

      These are adorable!
      Jessica
      http://sunnystitching.blogspot.co.uk/

    11. Gina @ MoneywiseMoms says

      February 19, 2013 at 11:56 pm

      These are lovely! I haven't tried homemade marshmallows yet.

    12. Maria says

      February 20, 2013 at 1:24 am

      How cute! These "eggs" look great!!! Love the pretty color too!

    13. arin says

      February 20, 2013 at 1:46 am

      these are sooo cool! I need to do this! Thank you so much for sharing this great idea
      arin
      apieceoflifespie.com

    14. Lisa says

      February 20, 2013 at 1:12 pm

      I have made marshmallows many times, but never anything as fabulous as this! Wow! Hope you can stop by the enchanted oven to say hi.
      xo,
      Lisa

    15. Danielle says

      February 20, 2013 at 1:31 pm

      Thanks for coming by to share these!

    16. Holly Legare says

      February 20, 2013 at 2:55 pm

      Beautiful! I love that you added specks to them. I've pinned to my "Easter" board.

      Holly
      Holly's Stamping Addiction

    17. Jeni says

      February 20, 2013 at 4:57 pm

      So sweet and dainty!

    18. J. Rae says

      February 21, 2013 at 12:31 am

      I would LOVE it if you shared this in my Spring/Easter Linky Party! You can find it here: http://littlemomprairie.blogspot.com/p/blog-round-up.html

    19. Christina at I Gotta Create! says

      February 21, 2013 at 12:10 pm

      Wow! I have not heard of some of these ingredients, but the eggs look stunning! Pinning!

      Thanks so much for linking up,
      <3 Christina @ I Gotta Create!

    20. Karen Mary Butterfly says

      February 22, 2013 at 5:45 am

      These are amazing! I love them!! Pinning them to my "Easter" board.
      Karen

    21. Natasha Hoover says

      February 22, 2013 at 12:00 pm

      Very cute! Great pictures, too. I love how you showed them off in the bird's nest! Pinning.

    22. Marie bloominghomestead says

      February 22, 2013 at 4:09 pm

      This is so perfect and really gets me excited about all things Spring and Easter. Thanks for linky up at Crafty Tuesday on Blooming Homestead!
      -Marie

    23. Rhonda says

      February 23, 2013 at 12:30 pm

      These are so beautiful! These would be beautiful in an easter basket or as a special treat in a cup of cocoa – Love!

      Visiting from Show and Tell Saturday… Rhonda @ home.made.

    24. Linda Bouffard says

      February 24, 2013 at 2:03 am

      Thanks for linking to what to do Weekends. I so appreciate it!! Such a beautiful blog like you have!! And these marshmallows!! I made marshmallows once. It's not hard, but it's messy and gooey. 🙂 Beautiful work. Linda

    25. Peggy~PJH Designs says

      February 24, 2013 at 4:53 am

      Aimee these are so cute and look yummy! Thanks so much for sharing at Transformed Tuesday.
      Hugs,
      Peggy

    26. cURioSItaELlyA says

      February 25, 2013 at 3:45 pm

      How pretty !

      http://www.curiositaellya.blogspot.com/

    27. Christine says

      February 25, 2013 at 11:19 pm

      This is soooooo neat!!! Love them!!

      Thanks so much for sharing this at The DIY Dreamer… From Dream To Reality! Can't wait to see what you link up tomorrow!

    28. Christine says

      February 26, 2013 at 11:50 am

      CONGRATS!!!! You have been featured at The DIY Dreamer!!
      Come on over and grab your featured button, you deserve it 🙂
      http://thediydreamer.com/from-dream-to-reality/10-features-55/

      Don't forget to come back to From Dream To Reality this evening to link up again 🙂

    29. CookTheStory says

      February 27, 2013 at 6:39 pm

      Hi,
      These are beautiful. I just have a question. You've written "I got the idea to use a flour mold from here" but there's no link. Where is the idea from? I'd really love to check it out. Thanks!

    30. CookTheStory says

      February 27, 2013 at 6:40 pm

      Ignore me. For some reason the link wasn't showing up and now, after I asked the question, it is. *sigh* Heading to check out the mould inspiration now. Thanks 🙂

    31. rachel rifat says

      March 3, 2013 at 7:15 am

      is there someway you can attach the two halfs together? corn starch is also a good mold maker! love love love your post! xo

    32. Cindy Cooksey says

      March 3, 2013 at 10:44 pm

      They look adorable. Unfortunately I have no idea what Leaf Gelatin is. (I'm in California)Where would you buy such a thing?

    33. scarletcalliope says

      March 4, 2013 at 7:39 am

      Wow! I got here from an article on Craft:Daily. I love these eggs, so cute! But I'm with Cindy, I'm also in Cali and I've never heard of Leaf Gelatin. Is this something that you get from a bakery supply? I'll google it! Thanks for the tutorial, love the heart shaped speckles!

    34. scarletcalliope says

      March 4, 2013 at 7:41 am

      I found the answer: http://www.thekitchn.com/whats-the-difference-gelatin-p-99070

    Primary Sidebar

    Hi there, I'm Aimee

    A food and photography lover. Welcome to Twigg studios. If you would like to find out more about me then head to my bio.

    LOOKING FOR SOMETHING?

    free visual storytelling guide

    Categories

    • baking (80)
    • cake (27)
    • dinner (14)
    • Drinks (2)
    • pasta (11)
    • photography (1)
    • recipe (186)
    • sweet (52)
    • tips (6)
    • Travel (6)
    • Uncategorized (827)
    Visit Twiggstudios's profile on Pinterest.

    Recent Posts

    • Hazelnut brown butter speculaas cookies
    • Grape and roasted hazelnut frangipane galette
    • Zesty vanilla Victoria sponge with rose macerated strawberries
    • Homemade Elderflower liqueur
    • Roast Strawberry Daiquiri & Pavlova
    • E-mail
    • Facebook
    • Instagram
    • Pinterest
    • Twitter

    LOOKING FOR SOMETHING?

    Visit Twiggstudios's profile on Pinterest.

    Recent Posts

    • Hazelnut brown butter speculaas cookies
    • Grape and roasted hazelnut frangipane galette
    • Zesty vanilla Victoria sponge with rose macerated strawberries
    • Homemade Elderflower liqueur
    • Roast Strawberry Daiquiri & Pavlova

    HELP

    • HOME
    • ABOUT ME
    • CONTACT ME
    Get in the know.
    Sign up with your email address to receive news and updates.
    As a welcome you will receive my presentation on visual storytelling
    Thank you for subscribing!

    INFO

    • E-mail Me

    twigg studios © 2025 - DESIGNED BY HERPARK STUDIO